Girls Like You
Buildng a camera in Vue.js for Maroon 5

Hot off my recent Guns N’ Roses project, I’ve been given another excellent opportunity to develop using the Vue.js frontend framework. This time the project is for Maroon 5, who as of today, have released a brand new video for their single Girls Like You off of “Red Pill Blues.” I’m sure this video will have no trouble marketing itself but we’ve chosen to launch a complimentary camera application to expand reach and further embed the theme of the video into fans’ social presences.
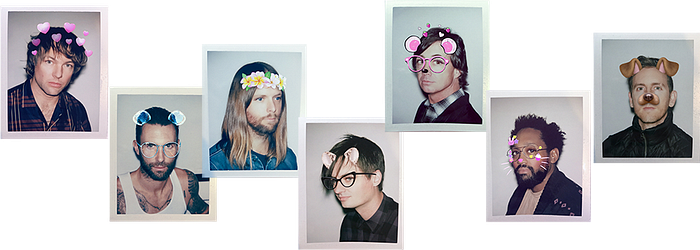
The camera concept is drawn from the static artwork associated with the video release which shows all of the cameos in the video collaged and blurred. Sitting on top the collage are the words GIRLS LIKE YOU set in all caps Arial Black on top. We’ll encourage users to include a phrase that best describes them. I figured this was a good opportunity to build a simple camera using Vue and tackle one of my biggest fears: text wrapping in HTML5 canvas.
Take a photo now and read on to find out how we built it.
WebRTC meet WebGL
I feel like I’ve written about my love for WebRTC a few times now but here I go again. Deal with it. The ability to get access to a user’s camera and microphone is now supported on nearly every device. This makes building applications such as a custom camera for the mobile web very easy. This time we built a variation on the basic camera app by adding a zoom blur filter. I had a hunch we could achieve this effect without burning too many resources by utilizing WebGL. Sure enough, a search for “WebGL zoom blur” surfaced Evan Wallace’s excellent glfx.js plugin and the filter of the same name.
So, instead of sending the raw video stream to a waiting video tag, I filtered it with glfx.js and sent it to a canvas tag. Easy enough.
canvas = fx.canvas()texture = canvas.texture(video)canvas.draw(texture).zoomBlur(
  1080 / 2,
  1080 / 2,
  0.20
).update()
Type Fitting
I’ve built countless projects with HTML5 canvas so I know about one of it’s biggest weaknesses: type. Well today’s the day we face our fears and attempt to develop something a bit magical and intuitive using the all the typography capabilities of canvas. If you’ve used the new Instagram story “Type” feature, you’ve probably seen the effect I’m aiming for. I would like the user to be able to type a phrase which starts out big but gets smaller depending on how many characters are on the line and how much space exists on the sides. In general, building a functional version of the type effect on display in the static artwork.
So if we think about this feature in the abstract, we’ll want the user to be able to begin typing and have the words they provide be displayed on an HTML5 canvas. I want the letters to be capitalized and for each space to create a word break in the display. First thing we’ll do is bound the data model “message” to the input and compute both an uppercase and word array version of the user’s text. Here’s the two computed properties I am using:
computed: {
  upper() {
    return this.message.toUpperCase()
  },
  words() {
    return this.upper.split(" ")
  }
}
So now that we have access to a capitalized and split version of whatever the user is typing, we’ll want to call a method which draws this text to the canvas as the user types. I recall that Android devices were having trouble firing an event after each keypress, and ended up following the suggestion on this stackoverflow. The trick is to manually update the message variable to match the input’s value with the input command.
@input="message=$event.target.value"And then watch the updated message and call your drawing method:
watch: {
  message(val) {
    this.drawText()
  }
}
Now for the hard part, how the hell are we going to do type resizing and word breaks when HTML5 canvas supports neither? Javascript, my friend. We’ll want to figure out exactly how big each word should be and where it should be placed before actually drawing it to the canvas. Luckily there is a lesser known canvas function that gets us there.
First, we’ll want to setup a couple of defaults including the max font size and max width we’d like the type to be. In addition, we’ll need a y variable that will be used to keep track of vertical placement and an array to store all of the compositions we’ll be drawing at the end.
let maxSize      = 192
let maxWidth     = 1080 - 200
let y            = 0
let compositions = []
Now canvas isn’t completely helpless when it comes to type. You can do alignment and baseline with it. In addition, let’s setup our base font family and size.
context.textAlign    = 'center'
context.textBaseline = 'alphabetic'
context.font         = `${maxSize}px Arial`
Next we’ll want to loop through each word and create a composition for each. Compositions will include the word, font size, and y position. We’ll use the measureText function that canvas provides to check the width of our word. If the width is less that the max width we specified, then the text size should simply stay the max size provided. However, if the width is greater than the max width, we’ll need to scale down the font size to fit. We’ll then increment our y positioner to place each subsequent word below the previous word with a touch of spacing. Here’s what that looks like:
this.words.forEach((word, index) => {
  let metrics = context.measureText(word)
  let scale   = metrics.width > maxWidth ? maxWidth / metrics.width : 1
  let size    = scale * maxSize  y += size + 20  compositions.push({
    word: word,
    fontSize: size,
    y: y
  })
})
Now these compositions would space our words out nicely but they don’t consider the overall vertical alignment of the word grouping. In order to do this, we’ll need another variable called offset which tells canvas at what vertical point we should start drawing text.
let offset = (1080 - compositions[compositions.length - 1].y) / 2We now have everything we need to draw the text onto canvas. Let’s do that!
compositions.forEach((composition, index) => {
  context.font        = `${composition.fontSize}px Arial`
  context.strokeStyle = "white"
  context.lineWidth   = 4
  context.lineJoin    = "round"  context.strokeText(composition.word, 1080 / 2, composition.y + offset)
})
This isn’t perfect but it actually works quite well and performs nicely on mobile. Maybe HTML5 canvas isn’t so bad. You can then use canvas to combine the blurred photo and type to create your final composition.
Uploading and Saving
Once the user creates their composition, they have the ability to save it immediately because we can easily update a downloadable image tag using the toDataURL function of canvas.
image.src = canvas.toDataURL("image/jpeg")In addition, we wanted to display the user’s composition on the front page of our experience and make it interactive. This should encourage further participation. The interaction we were aiming for was displaying the blurred photo initially and uncovering the sharpened photo and text composition upon hover. In order to pull this off, I used Vue’s vuex state management library to store canvases for the original photo, blurred photo, and type composition. I then arranged this on a larger “sprite sheet” canvas and used the excellent uploading library Uppy to store those to an S3.
I then used CSS to layer the sprite sheet as multiple background images and brought out the background-blend-mode property to blend the text on top of the image.
li{
  background-size: cover;
  background-position: -100% 0;
}li:hover, li:active{
  background-blend-mode: lighten, normal;
  background-position: -200% 0, 0, 0;
}
Simple stuff.
Thanks
Thanks to Maroon 5 and Freddie Morris at Career Artist Management for entrusting me with this one. It was certainly a fun build and I look forward to seeing fans create their photos. Make sure you check out Maroon 5's new video for Girls Like You.