How to Build an Off-White™ Parody “CAMERA”
Using Vue, WebRTC, and IBM Watson

I found myself in creative limbo at the beginning of this week having just finished the Dave Grohl PLAY web experience and making preparations to leave on Monday for a week in Olympic National Park. Having this week without client work seemed like the perfect opportunity to begin a transition into “vacation mode.” What I needed was a creative pursuit to keep me from thinking about work or accidently taking a project…
I honestly can’t remember what triggered this idea. Maybe the fact that I used IBM Watson on a recent Behemoth project? Maybe because I follow Virgil Abloh and Off-White on Instagram? Perhaps it’s because I’m always thinking about building camera apps. Whatever the reason, the idea was simple:
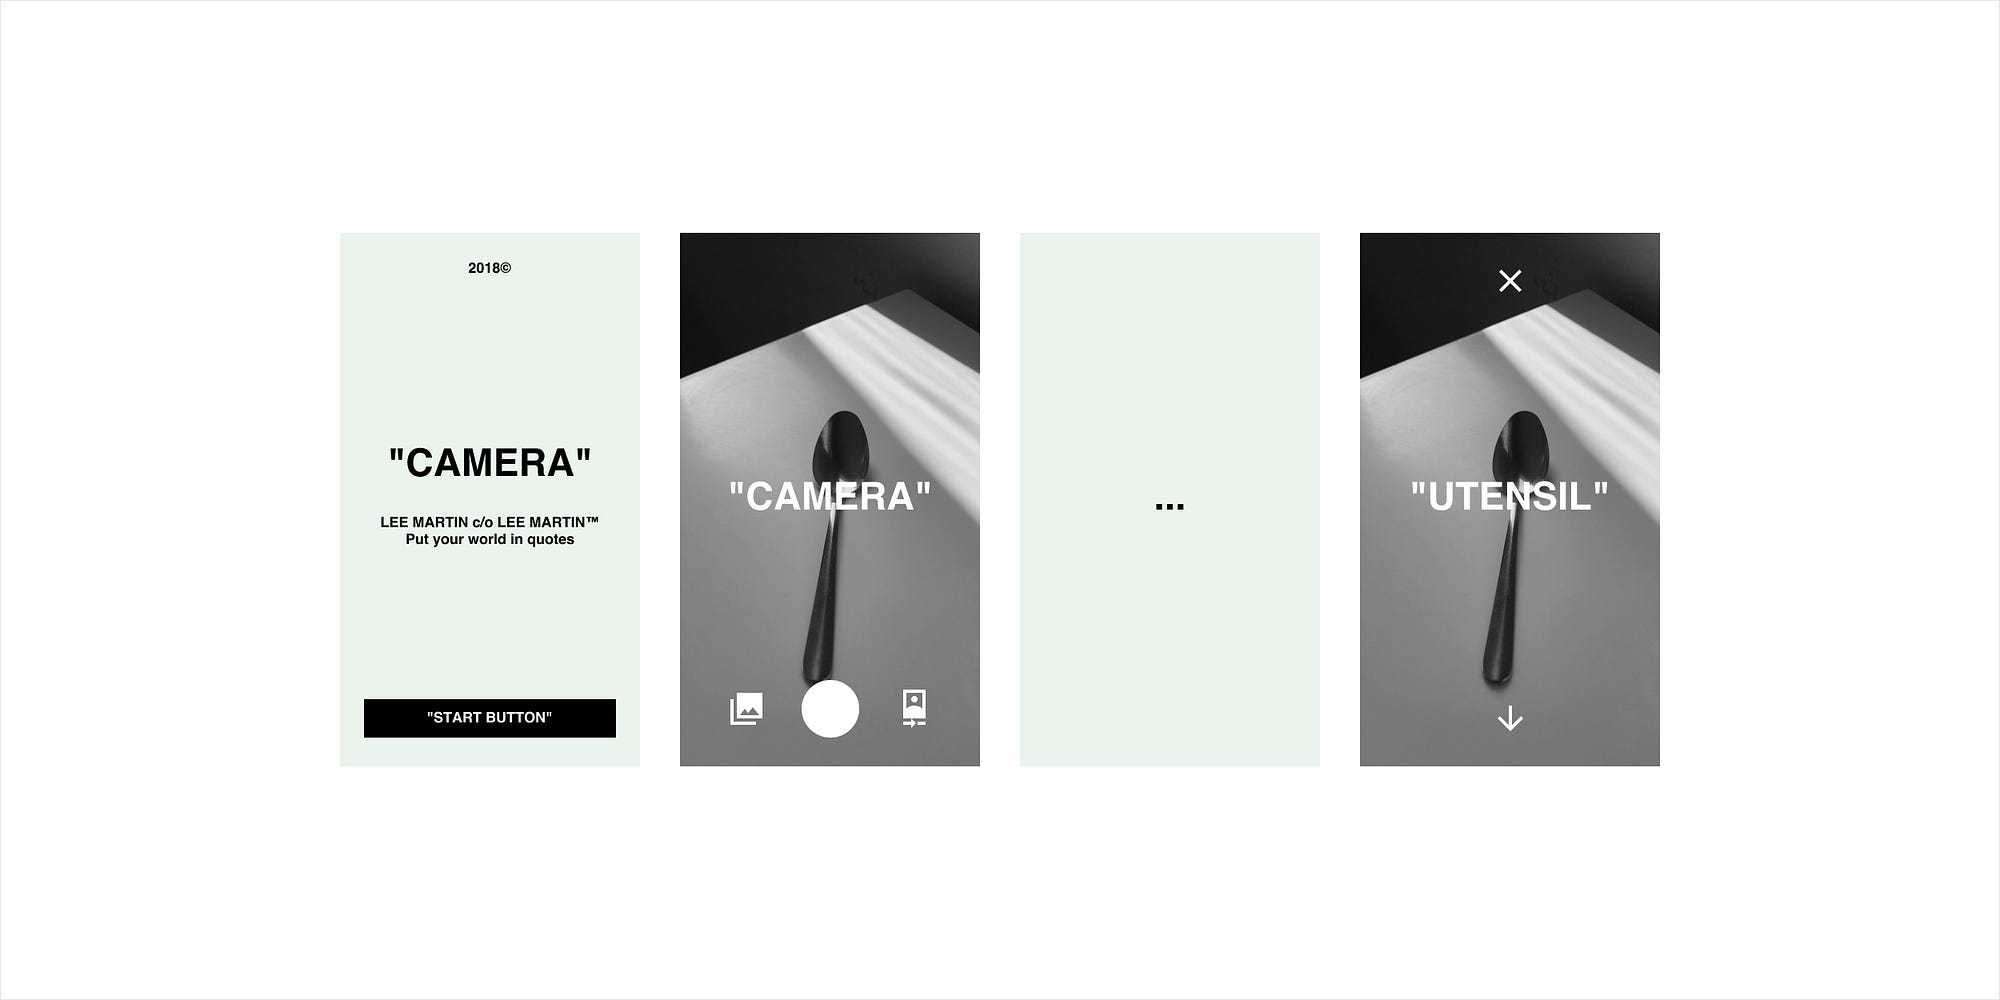
I wanted to build a camera web app that could identify objects using IBM Watson’s Visual Recognition service and compose a new image of the photo and object title set in bold Helvetica text, enclosed in “QUOTES”.
Why the quotes?
Well, Virgil and Off-White have a tendency to label the products they sell in this manner. A white tee for instance would be labeled “T-SHIRT.” Whereas a pair of boots might be labeled “FOR WALKING.” Hell, even their website is titled “WEBSITE.” Why do they do this? Detachment? Irony? A shift of perception? It’s worth checking out this High Snobiety article and Virgil’s interview with 032c to unravel his thinking. Regardless, you can’t deny the impact of bold Helvetica text in all caps on a product or image. Helvetica is used so often that it’s become more than a typeface and it’s the perfect family for this purpose.
Try it out now on “MOBILE” and read on to build a “CAMERA.”

I really enjoyed my time integrating Watson’s Speech to Text service into our Behemoth campaign and I made a mental note to check out some of the other services IBM offered later on. Well that opportunity came quicker than I expected. 😅 IBM offers a service called Visual Recognition which can classify visual content found in images. Once you’ve setup an IBMid and provisioned the Visual Recognition service, you’ll be given a APIKEY which you can use immediately to start classifying images with curl.
curl -X POST -u "apikey:APIKEY" --form "images_file=@test.jpg" \
"https://gateway.watsonplatform.net/visual-recognition/api/v3/classify?version=2018-03-19"
Watson will then return a JSON response which includes an array of classifications for the provided image. Curl is great for testing and making sure an API is capable of doing what you require. However, I was building the app in Nuxt and will need to integrate Watson’s node-sdk instead. I’ll be doing that by creating an Express route which can receive an image as POST, pass it over to Watson to be classified, and return Watson’s response as JSON.
One way to do this is running Nuxt programmatically from an Express server but I’d rather not do that. Instead, I’m going to use the excellent nuxt-express-module to create a route only for this purpose. One thing Express doesn’t handle any longer is parsing files which are sent to a POST route so we’ll also need to use Multer to help with that. Once you’ve npm installed watson-developer-cloud, nuxt-express-module, and multer, you can create the following route in your Nuxt application.
const { Router } = require('express')
const router     = Router()
const watson     = require('watson-developer-cloud')
const multer     = require('multer')
const upload     = multer()let visualRecognition = new watson.VisualRecognitionV3({
  url: 'https://gateway.watsonplatform.net/visual-recognition/api',
  version: '2018-03-19',
  iam_apikey: APIKEY
})router.post('/api', upload.single('virgilPhoto', (req, res) => {
  let params = {
    images_file: null
  }  if (req.file) {
    params.images_file = req.file.buffer
  }  visualRecognition.classify(params, function(error, response) {
    if (error) {
      res.status(error.code || 500).json(error)
    } else {
      res.json(response)
    }
  }
})module.exports = route
First, we’ll require all the libraries we’ve installed. Then we’ll initialize the IBM Watson Visual Recognition service using out APIKEY. Next we’ll create a POST route with express, utilizing the multer library to have this route check for a single image named “virgilPhoto.” We’ll then create a params hash with the property images_file which will contain the sent file’s buffer. Finally, we’ll call Visual Recognition’sclassify method on these params and return the results (or error) back to our user in JSON. Now that our endpoint is setup, let’s take some photos on the client using Vue and Nuxt.

Building a WebRTC powered camera for the mobile web is pretty simple. All you need to do is prompt the user to gain access to their webcam, feed the webcam stream to a waiting <video> tag, and then provide a method for taking photos. Here’s how I might do that in Nuxt. First, I would add the <video> tag to my <template>. The ref property allows me to easily access my <video> tag within any Vue methods I’ll create. I’m also adding an <img> tag which will receive our final image (for saving) upon completion.
<template>
  <video ref="video" autoplay playsinline></video>
  <img ref="photo">
</template>
Then, in an startCamera method, we’ll prompt the user to gain access to their webcam and send the stream to the <video> tag, catching errors along the way. The constraints for my app are pretty simple. I don’t need audio so I’ll set it to false and I’ve chosen the facingMode of the video to be environment so the back facing camera is used.
startCamera() {
  navigator.mediaDevices.getUserMedia({
    audio: false,
    video: {
      facingMode: 'environment'
    }
  }).then((stream) => {
    this.$refs.video.srcObject = stream
  }).then((error) => {
    // do something with error
  })
}
I choose to call this method as soon as my Vue component is mounted. When the user allows access, the camera will immediately begin streaming to the <video> tag. Next we’ll want another method called takePhoto to, you guessed it, capture photos. The process of taking photos from a webcam stream involves drawing the current <video> tag image to a waiting HTML5 canvas. That canvas can be visible to the user or simply offlined to your code. I’ll choose the latter. In addition, I will grab the video height and width to help establish the size of my canvas.
takePhoto() {
  let video = this.$refs.video
  let videoWidth = video.videoWidth
  let videoHeight = video.videoHeight  this.photo = document.createElement('canvas')  this.photo.width = videoWidth
  this.photo.height = videoHeight  let photoContext = this.photo.getContext('2d')  photoContext.drawImge(video, 0, 0, videoWidth, videoHeight)  // classify photo
}
Note, this is a very simplified example. I tend to also use some dynamic resizing depending on what the final format of the photo should be. A good library for handling that is Javascript Load Image by blueimp. Once your photo is captured, you’re ready to send it to Watson for classification. You can either merge that logic into takePhoto method or create a new one just for classifying.

We’ve got our Express endpoint awaiting images and a way to capture photos from the user’s webcam. How do we send those new images to the endpoint for classifying? I choose to use the handy FormData web api to generate a new form post on the fly. However, we can’t just send the canvas over, we’ll need to convert it to a blob (or file-like object.) Luckily, this is all pretty damn “EASY.”
photo.toBlob((blob) => {
  let fd = new FormData()fd.append('virgilPhoto', blob)fetch('/api', {
    method: 'POST',
    body: fd
  }).then((response) => {
    return response.json()
  }).then((data) => {
    this.classes = data.images[0].classifiers[0].classes    // compose text on photo
  })
}
I now have the data required to begin composing my final image. However, IBM Watson will actually send over several classifications (including color) for your photo with scores. I would like to grab the highest scoring class which isn’t a color. In order to do this, I’ve set up three computed properties with Vue to filter, sort, and expose the top class. First, let’s filter out any classes which include the word “color” with the es6 array filter method.
filteredClasses() {
  return this.classes.filter(c => !c.class.includes('color'))
}
Then we can sort the remaining classes by their score, making sure to reverse the array to order from highest to lowest.
sortedClasses() {
  return this.filteredClasses.sort(function(a, b) {
    return a.score - b.score
  }).reverse()
}
Finally, we can then pluck the highest score from the top of the array and make it’s containing class string upper cased and ready for Helvetica bold.
topClass() {
  return this.sortedClasses[0].class.toUpperCase()
}
Now if we call this.topClass we’ll get the name of the highest score class in all caps. Let’s go ahead and use HTML5 canvas to finally draw that text onto our captured photo.


Drawing text onto a photo with HTML5 canvas is remarkably easy. You simple set up your font styles similar to CSS and then use the fillText method to draw a phrase onto the canvas at a specified x and y position. However, as I learned in my Maroon 5 campaign, dealing with the size of words (and in that case word wrapping) is a bit more tricky. In the case of this project, I decided on the goal of simply not allowing the phrase that Watson provided to overflow the size of the photo — even though that might seem fashionable. We can do this by using HTML5’s measureText method again.
First, let’s establish what we think our maximum font size should be and how wide the phrase is allowed to be on our image. I chose my max font size by creating an image in Figma with text on top that looked good to me and then I grabbed the scale of that font as it related to the height of my document.
let maxFontSize  = this.photo.height * 0.072
let maxWidth = this.photo.width - maxSize
We can then set a couple of default font and text properties on our canvas.
photoContext.font = `bold ${maxFontSize}px Helvetica`
photoContext.textAlign = 'center'
photoContext.textBaseline = 'middle'
Before we write any text to our photo canvas, let’s measure it. By establishing out default font property, canvas is able to give us metrics that will tell us how wide our phrase will be in relation to our canvas. If the phrase is smaller than the max width allowed, we can use our established max font size. If not, we’ll want to calculate a new font size with the maxWidth, newly uncovered phrase width, and maximum font size.
let metrics = photoContext.measureText(`”${this.topClass}”`)
let scale = metrics.width > maxWidth ? maxWidth / metrics.width : 1
let fontSize = scale * maxFontSize
We now know exactly how big the phrase should be on our image so let’s reset our font property and write the text onto our canvas.
photoContext.font = `bold ${fontSize}px Helvetica`photoContext.fillText(
  `”${this.topClass}”`,
  this.photo.width / 2,
  this.photo.height / 2
}
There’s only one more step and that’s adding our photo to the view as an image so the user may download it on mobile. Remember that <img> tag we added in the <template> earlier? It’s time has come.
this.$refs.photo.src = this.photo.toDataURL('image/jpeg', 1.0)Your completed image should now be viewable to your user. Since they’re on mobile, I would suggest adding instructions for them to “PRESS AND HOLD” to download.


Thanks to everyone that jumped into my original Twitter thread to encourage the development of this hack and prevent me from thinking about work too much this week. Shout out to Alec Leach for writing the High Snobiety article which helps frame this concept for the uninitiated. Thanks to IBM Watson for another excellent service. (I wonder which service I’ll hack on next.)
And finally, thanks to Virgil Abloh and the Off-White team for providing this inspiration. I will trade you this website for a pair of “VULCANIZED” Off-White x Chuck Taylor in 10.5.